
Frequently asked questions
-
Gradebook question: Do all the weights have to add up to 100 or some similar value?
-
Gradebook question: How to give extra credits?
-
Why is a student who appears on my SPIRE roster unable to access my Moodle course?
-
Can I track students' completion of activitites without giving them grades?
-
Can I delete the user data and reset the completion tracking?
Find a user in Moodle
Log in Moodle with consultant ID→Users on the right side of the screen →Account→Browse all users→input the Last name or the Full name of the one you want to search.
How to hide a course to students?
By Quick Settings
On the right hand of your Moodle course page, in the Quick Settings block, for Course available?, to hide a course, choose No.

By Edit Settings
Step 1: In the Administration Block, under Course Administration, click Edit Settings. The Edit course settings page will open.

Step 2: On the Edit course settings page, below General, for Visibility to Students, select Hide or Show.

Step 3: Click Save changes.
TAs must be listed in SPIRE as a Teaching Assistant or Undergraduate Student Assistant (Student Assistant Moodle Only) in order to have access to the Moodle course for the class.
By default, TAs and Student Assistants automatically receive access to Moodle in the role of Non-Editing Teacher, which allows them to access student resources and activities and read and grade student submissions.
If a TA needs to upload materials or add activities to a Moodle course, the instructor can add the Course Designer role for that individual.
Do all the weights have to add up to 100 or some similar value?
WEIGHTED MEAN OF GRADES
No, the numbers you put as weights are completely arbitrary. They must be positive numbers, and can add up to anything you want.
Note however that the following four sets of weights are identical in value:
(1 1.75 3)
(4 7 12)
(8 14 24)
(400 700 1200)
NATURAL GRADING
Yes. Natural grading weights MUST equal 100%.
If you manually adjust the values of EVERY grade item, and they do not equal 100%, upon saving they will be adjusted to equal 100%, retaining your weighting preferences.
If you only adjust a few of your grade items, the remaining items weights will be adjusted so that the total comes to 100%.

How to give extra credits?
How to give students extra credit for a grade item?
Step 1: Click on edit next to the grade item and select Edit settings from drop down menu.
Step 2: On the Edit settings page for the grade item check the Extra credit. Then Save your changes.
Step 3: For an example of how this all works with actual grades let’s go to the Grader report on the left side of your Moodle course page, or click on the view tab in the middle, which allows you to view and edit the grades your students receive from completing the various course activities.
E.g:
The maximum grade for the xx is 100 points.
We’ve set up the other xx assignment as an extra credit item worth a maximum of 20 points.
If a student receives an 85 on the xx and earns the full 20 extra credit points for the other xx assignment, then they will earn 100 points for the category total since the total for the category is 100 points.
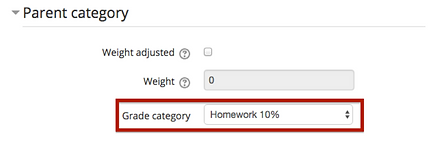
How to add an extra credits activity in Gradebook?
Step 1: Click on Gradebook setup in Administration block. The Gradebook setup page will open, scroll down to the bottom of the page, click on Add grade item button.

Step 2: Name the item, e.g: Homework 5 (bonus).

Step 3: Set the Maximum grade.
Step 4: Choose the Grade category.
How long will my course remain on Moodle?
Courses are deleted from Moodle 18 months after the close of the semester taught to make room for future courses.
Unfortunately, it is not possible for us to maintain long-term storage of Moodle courses due to limited physical space and resources.
This allows ample time for students to resolve an Incomplete grade, and for faculty to make their own archives of course work for future reference.
When the Moodle course will be released?
Usually course will be released to students 3 days prior to the beginning of the semester.
When does student access to a Moodle course begin and end?
Moodle courses are automatically made available to students 1 business day before the start of the term, and student access is removed 2 weeks after grades for the term are released.
However, instructors can hide courses that are not ready for use, or open courses prior to the beginning of the semester. See How to hide a course to students.
Note: Moodle courses requested after the release date at the beginning of the semester are not automatically released and must be made available to students by the instructor.
Why is a student who appears on my SPIRE roster unable to access my Moodle course?
There are a few possible situations that could be causing a student who is registered in SPIRE to be unable to access a Moodle course. Some troubleshooting to consider:
-
Make sure the student is logging in to Moodle and not Blackboard Learn.
-
Consider how long ago the student officially registered for the course in SPIRE.
Moodle course rosters are updated automatically every hour with student data from SPIRE.
There may be up to a 1 hour delay between when a student registers for a course and when that student is enrolled in a Moodle course.
-
The student must have an active IT Account. Students can get help with their NetID and password by coming in person with their student ID card to the IT User Services (A109 LGRC).
Note: Professors should direct student problems to User Services.
I am co-instructing a course, or have a Course Designer in my course. What happens if we both edit something in Moodle at the same time?
Moodle does not warn users who are both editing the same item—rather, the last person to Save will overwrite the other person's work.
We recommend coordinating with your co-instructor or designer to avoid editing items simultaneously. Either plan which activities and resources "belong" to each of you, or e-mail each other when editing.
Note: Exception: In a Wiki activity, only one person at a time can edit a Wiki page.
How to change course format in my Moodle course?
Step 1: Click on Turn editing on link in the navigation bar in your Moodle course.
Step 2: Click on Edit settings link in the Administration block which is on the left of your Moodle course.
Step 3: Unfold Course format.
Step 4: You can choose the format you like in Format.
The Course format determines the layout of the course page.
-
Single activity format - Only a single activity or resource (such as a Quiz or SCORM package) is shown on the course page (with no option to add additional activities or resources).
-
Social format - A single forum is displayed on the course page (with no option to add additional activities or resources).
-
Collapsed Topics (default) - Individual users can expand and collapse sections to avoid scrolling long course pages. Course sections can be organized by topic, week, or day, with the option to force the current Section to top of page.
-
Topics format - The course page is organized into topic sections.
-
Weekly format - The course page is organized into weekly sections, with the first week starting on the course start date.
With Topic format, on your Moodle course page, details about each section are folded. On section page, learners are able to navigate to previous or next section by links or Jump to… drop down menu.
Can I track students' completion of activitites without giving them grades?
Yes.
You can enable the Completion tracking in Edit settings to track students' completion of Activities and Resource.
To set whether students can mark their completion manually, set up the settings in Edit settings for each Activity and Resource.
Can I delete the user data and reset the completion tracking?
Yes.
You can delete data like user's posts and completion data by clicking on Reset link in Administration block.
Note:
Not all organizations have Reset link as default. You need to contact your organization's Moodle Technical Support if you cannot find it.
Can I restrict users' access to an Activity/Resource?
Yes.
You can click on Editing settings for the Activity/Resource you would like to restrict users' access to it.
For e.g: If you would like users to finish Activity 1 first, then they are able to attempt Activity 2.
Step 1: Click on Turn editing on in Navigation bar in your Moodle course.
Step 2: Click on the Activity/Resource you would like to restrict.
Step 3; Click on Edit settings in Administration block.
Step 4: Unfold Restrict access.
Step 5: Click on Add restriction button.
Step 6: Choose your [Activity 1]. Then choose the conditions.
Step 7: Click on Save and return to course button when you finish setting up.
Set up a Buzzfeed type Quiz in Moodle
Can I set up a Buzzfeed type Quiz in Moodle?
The answer is of course you can!
So what’s the best activity to set up these kind of Quiz?
Questionnaire or Quiz?
I would say Quiz.
Even though Quiz doesn’t have Yes/No type and Scale type questions. It’s still the best choice for making a Buzzfeed quiz.
Even though Questionnaire has Yes/No type and Scale type questions. It cannot give users immediate feedback, or we should say any feedback. We can only choose whether to show the Questionnaire Result Report to users.
Because Quiz doesn’t have Yes/No type questions. So when you transfer a Buzzfeed Quiz to Moodle, I would recommend you choose Multi Choice questions type to replace Yes/No type.
In a Buzzfeed Quiz, usually the feedback is based on the scores/points users get, in Moodle we can also set it up that way.
Step 1: Click on Edit Settings in Administration block when you set up the Quiz.
Step 2: Unfold Overall feedback.
Step 3: Let’s set up the Grade boundary!
For e.g: we are setting up a Buzzfeed Quiz by Quiz Activity in Moodle.
The feedback are changed based on three points scales:
0-14
15-19
20-25
So now how can we set up the feedback boundary?
When you unfold the Overall Feedback, you can see Grade boundary 100% and Grade boundary 0% is already there. That means “0” and “25” in our scale is represented already. So what we need to do left is transferring “14” and “20” to percentage and put them into the Grade boundary between 0% and 100%.
Let’s click on Add 3 more feedback fields button below the boundaries.
Put 56% and 80% into the blank space behind Grade boundary.
Note: Form sensitive here. Must include percentage mark %.
Because 14/25=56% and 20/25=80%.
Put feedback for scale: 20-25 into the Feedback area between 80%-100%.
Put feedback for scale: 15-19 into the Feedback area between 56%-80%.
Put feedback for scale: 0-14 into the Feedback area between 0-56%.
That’s it! Thanks to Sadaf my friend who helped me figure that out :)
Also, for a Buzzfeed Quiz, in Edit Quiz setting, when you set up the new questions, if a Yes makes the Quiz taker get 1 point, No gets 0 point. Then just select 100% behind the the Grade in Answers for Choice 1: Yes. (If you set Yes as the Choice 1)
And select None behind the Grade in Answers for Choice 2: No. (If you set No as the Choice 2)
Also remember to select 0% for Penalty for each incorrect try in Multiple tries. If you don’t have correct/incorrect answers for your Quiz.
How to set immediate feedback for Quiz
-
Open the Quiz that you want to make changes on.
-
Click on Edit settings in Administration block.
-
Scroll down to Question behavior.
-
Choose Interactive with multiple tries in How questions behave
-
Unfold Review options, Check Whether correct, and Specific feedback below During the attempt
-
Then click on Save and Display.
-
Try to attempt your quiz, you will see for the questions which have specific feedback, there will be a Check button below the last option.

