
Database
The Database activity allows students and/or instructors to populate, display, search and comment on a bank of record entries. Participants can create, maintain and search a collection of entries (i.e., records).
The structure of an entry is defined by the teacher as a number of fields. Field types include checkbox, radio buttons, drop-down menu, text area, URL, picture, and uploaded file.
Database activities may be shared between courses as presets and a teacher can also import and export database entries.
What is Database for?
Versatile settings options make the Database activity well suited for many different kinds of assignments, such as collecting and sharing information, giving students a data array to work with, and presenting content for students to comment on.
Database activities have many uses, such as:
-
A collaborative collection of web links, books, book reviews, journal references etc.
-
Displaying student-created photos, posters, websites, or poems for peer comment and review
What is Database?
Difference between Glossary and Database [Table]:

Database setup:
Entries

-
Approval required
Allows you to require that an instructor or TA approve each entry before other students can view it.
-
Allow editing of approved entries
Allows users who added the entries which are already approved to edit or delete those approved entries later (This setting has no effect unless Approval required is enabled. )
-
Allow comments on entries
Allows users to comment on each other’s entries.
Note: The Comments option will display when users view entries individually, but not when viewing a list of all database entries.
-
Entries required for completion
The number of entries each student is required to add before the Database activity is considered complete. Students will see a reminder message if they have not submitted the required number of entries.
-
Entries required before viewing
The number of entries a student must submit before they can see entries by other students.
-
Maximum number of entries
The maximum number of entries a student can submit before they are blocked from adding more.
Ratings
View and adjust how instructors and TAs will grade entries.

Roles with permission to rate
Identifies users who have permission to rate items. The list of roles may be changed via the permissions link in the Administration block.
Aggregate type

Determines how the ratings are entered as a grade in the Moodle Gradebook.
Scale
Sets the maximum score for the activity.
Note: For the Sum of ratings aggregate type, select the maximum for the sum of all ratings (the total grade for the activity), not the maximum for each rating.
Restrict ratings to items with dates in this range
Limits the time frame during which items are available for rating. Check the box to enable the drop-down date windows.
Edit Database:

Please follow the number in the picture above to edit your database:
Step 1: Select Fields

What is Field?
Notes: To reduce setup complexity, we recommend creating all database fields before defining templates. If you add a new field to a Database activity after saving templates for the first time, you will need to Reset the templates before the field will display to users.
A field allows the input of data.
Each entry in a database activity can have multiple fields of multiple types such as a date field, which allows participants to select a day, month and year from a drop-down list, a picture field, which allows participants to upload an image file, or a checkbox field, which allows participants to select one or more options.
Create a new field
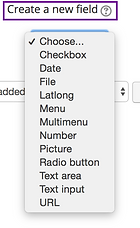


Choose a file type you want to add in the drop down menu of Create a new field.
Each field must have a unique Field name. The Field description is optional.
Step 2: Select Templates
Add template
Step 3: Click on Add template.


If I already created three fields in Step 1.
When I click on Add template, the three fields will show in Add template editor block.

If you want to choose a field and add it: Click on the field below Fields in Available tags.
If you want to remove a field: Delete it.
Note: You cannot remove a field below Fields in Available tags.
Once it’s finished, click on Save template button.
If it’s finished successfully, you will get a successful message.

If not, you will get a warning message (usually failure is because the form is messed up.)
Add entry
After you have defined database fields and templates, click Add entry to create entries and populate the Database activity.

Here you can see this entry use the template we just added.
Click on Save and view button once you finish adding the new entry.
Use Database
Once entries have been saved in the database, you can begin to use the Database.
Use Database [Table]
![Use Database [Table].png](https://static.wixstatic.com/media/d189e8_010d2f16cfb5482ba1dfc2c0f01349da~mv2.png/v1/fill/w_600,h_284,al_c,q_85,usm_0.66_1.00_0.01,enc_avif,quality_auto/Use%20Database%20%5BTable%5D.png)